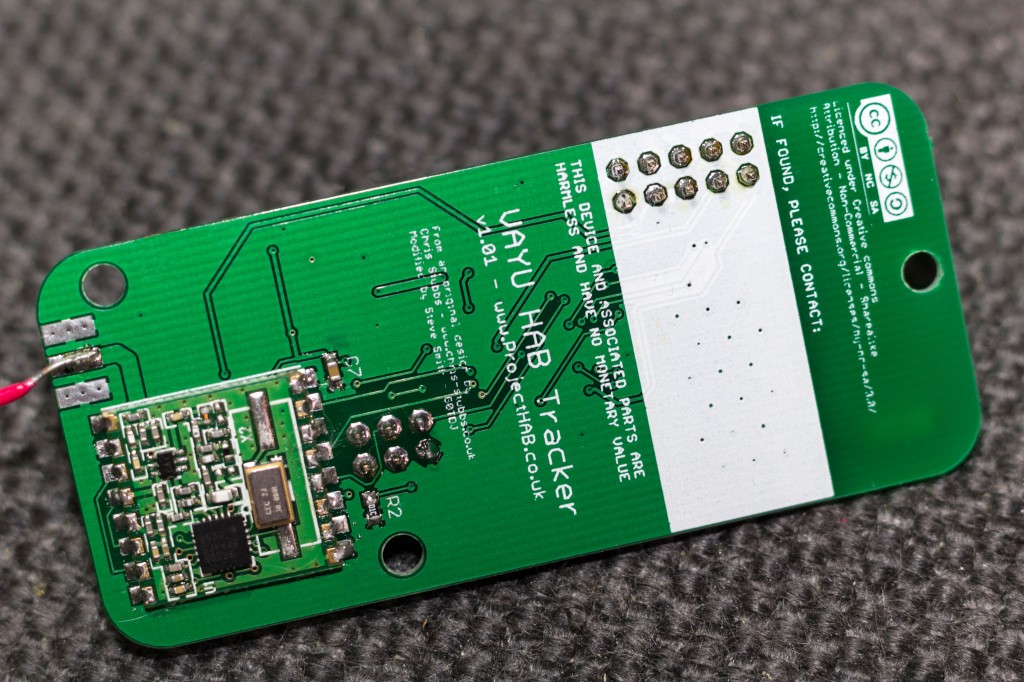
This page holds all the files necessary to make the VAYU v1.02 PCB and the code to program the ATMEGA328P AVR device. The design is released under Creative Commons Attribution – Non-Commercial – Share Alike. This means you may distribute this design with credit to the creator, modify it but it must not be used for commercial gain. Any modified version should also be made available freely.
This design came about after I recovered a tracker board by Chris Stubbs. I had been interested in High Altitude Ballooning for some time but this was the first time I had become directly involved. Chris kindly sent me an unpopulated tracker board as a thank you for recovering his payload. This was his CHEAPO design. Chris was also kind enough to supply me with the original Eagle files that he used to produce the boards. After I had reviewed them, I wondered if I could improve on the already good design. Chris had recommended that I use a boost regulator to power the board as the on board regulator was highly inefficient. For the purposes of getting the original board active, I used an inexpensive Chinese pre-made design. The first improvement I made was to design a boost regulator circuit to fit directly on to the pcb rather than use an outboard circuit. I chose the Texas Instruments TPS61016 3V3 fixed regulator. This would mean I didn’t have to do any formulas to work out voltage output etc.
I had already removed the microSD card socket since telemetry can be extracted from the Habitat website after a flight. This gave room for the regulator circuit. Chris assisted me in designing extra large traces to deal with the ‘high’ current that might be used by the regulator chip.
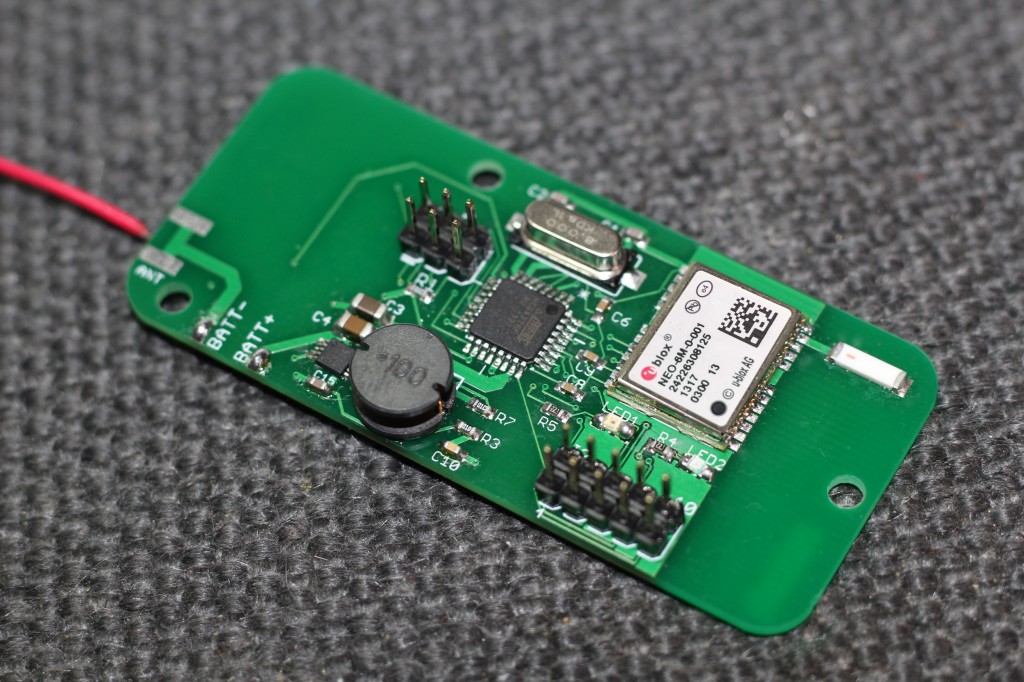
Chris had broken out one line from the MCU on the original CHEAPO board as a line to test the pcb was working. Using the standard Arduino ‘Blink’ sketch, you could read the pin voltage to make sure all was well. I liked this idea but thought that it would be far easier to have an LED ready to go on the board as standard. In the end, I added two for flexibility for indicating various statuses. I also thought it would be useful to break out more of the spare lines from the MCU and I eventually broke out eight lines plus a couple of GND connections to an optional 10-pin header.
With these changes, I named the board VAYU after the Hindu god of the wind. The version number was 1.01. Before I completed the design, I had an opportunity to fly my first payload which was Chris’s now populated CHEAPO pcb. I had cheekily re-named it VAYU-1 The actual flight documented in the blog was not successful from a flight point of view but was a great experience. One of the things I identified when launching was that it needed a power switch. When I got back to finalise the design, I added a power switch but with an option to bridge two contacts with solder in case the switch wasn’t required.
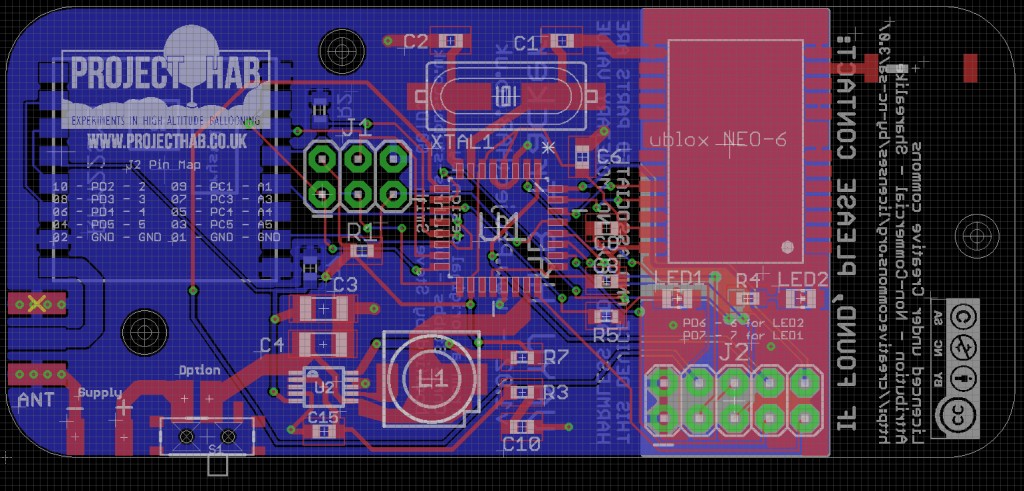
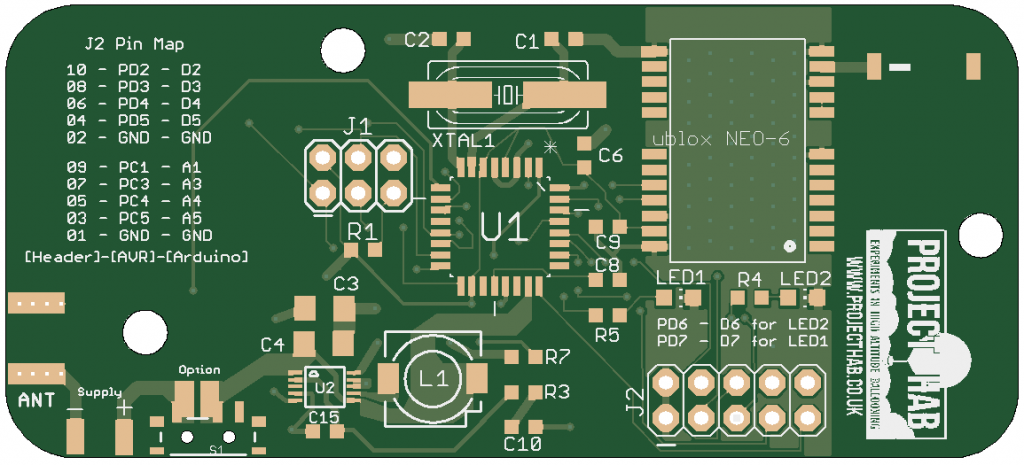
The final touches were to add the website logo and a table of the pins broken out on the header J2. These are listed in the format [Header Pin]-[AVR Designation]-[Arduino Pin]. This became VAYU v1.02 Because I used Hackvana to fabricate the board, I have included a zip file of the Gerber files. You can supply this direct to Hackvana as-is for fabrication. You must request ‘No Pullback’ in the order since a couple of the contacts run right to the edge of the board, this is important. Also, Mitch who runs Hackvana likes a quick chat before you go ahead and order. You can reach him easily on IRC from your browser via #Hackvana to chat in real-time on the keyboard. He can advise you about the process of fabrication. I would also recommend that you read THIS FAQ thoroughly.
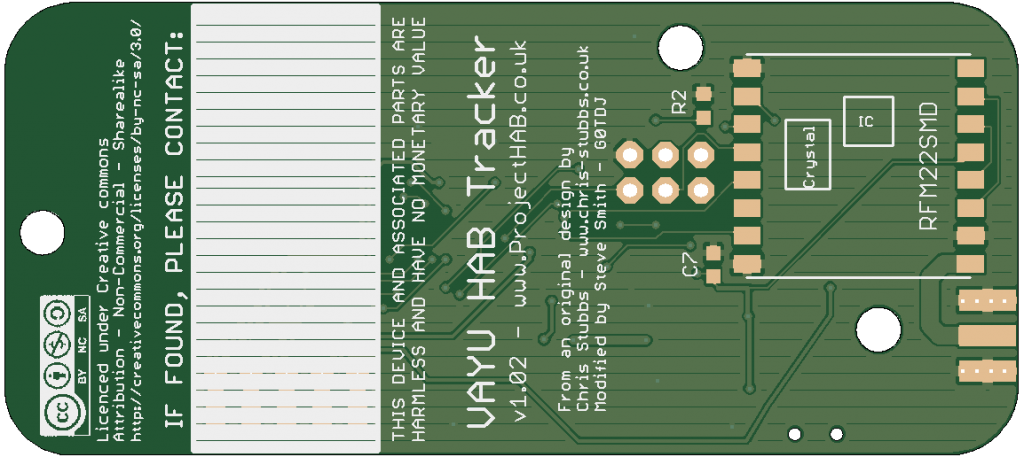
If you wish to create the board yourself, there are PNG versions of the copper tracks. Below are images captured from the Gerblook website which renders Gerber files. There is also an INO file which is the code to program into the AVR Microcontroller. This will need to be customised to taste. The three things that need setting are the Latitude and Longitude in lines 56 and 57: hlat & hlon. These values can easily be found on Google Maps by right-clicking on your launch location and selecting ‘Whats here?’ This will place the Latitude and Longitude values in the search bar for you to copy. The next thing that needs to be set is the pin for reading the battery voltage. In line 191: ‘vbatt = ((3.3 / 1024)* analogRead(1) );’ the number in the analogueRead parameter needs to be ‘0’ (zero). Next, scroll down to line 203 which is the telemetry. Change the callsign from VAYU-1 to your payload’s callsign. Maintain the ‘$’ signs before it. Of course, you can customise the code to work however you like but these three settings must be set as a minimum.
To save the following files, right-click and save-as.
- VAYU v1.02 Eagle v6.3.0 .SCH file
- VAYU v1.02 Eagle v6.3.0 .BRD file
- VAYU v1.02 Gerber ZIP File
- VAYU v1.02 .ino file
- VAYU v1.02 PNG Image files
- VAYU v1.02 Parts List
- VAYU v1.02 Circuit PDF
The entire directory of resources is available at VAYU_v1.02
I have received a lot of assistance whilst creating this design. I must thank Chris Stubbs for his countless hours checking my board in Eagle. Also for allowing me to modify and publish the design. Also I owe a debt of gratitude to Dave Akerman, Anthony Stirk, Leo Bodnar, Matthew Beckett and all the great folk in the UKHAS community for their advice and support.

VAYU v1.02 by Steve Smith is licensed under a Creative Commons Attribution-NonCommercial-ShareAlike 3.0 Unported License.

You must be logged in to post a comment.